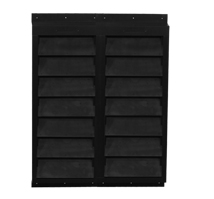
It took longer to get the panels out of the packing boxes than it did to put them up. About 4 minutes a piece to install. Installation is a very simple process after you install the first module. Make sure you keep it as level as possible and the rest just slide together. There are 3 screws on the top and 3 on the bottom of each solar air heater module. Easy!
see more pictures
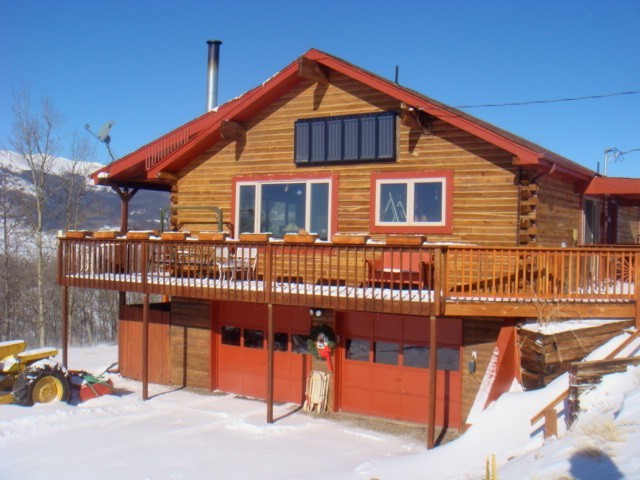
Planning ahead would simplify the installation of each Solar Air module. Prior to starting the installation I had my installation all planned out, thanks to he help of the owner of Solar Air Systems. Because of my location, we decided that a vertical installation would be fine and there is no need to angle the modules. Also, we decided a boxed frame with siding insulation behind the modules would work better than just attaching them to the uneven surface of my house.
As you can see illustrated in the pictures, my home is a log cabin design. Framing the area and placing exterior siding insulation inside the wood frame would be the easiest solution to the uneven surface area where the solar air modules would be installed. The frame attaches to the exterior walls (which are not flat) and the siding insulation is just rigid enough to mold over the uneven exterior surface. With the sudden and rapid temperature change I’m hoping the insulation will protect the panels and eliminate any air gaps between the back of each module and my house. Snowy weather and strong winds were a factor too.
Connecting panels 1 thru 6 (Right to left) in a raging snow storm was no fun but each Solar Air Module went up fast and easy. The fit is very good between panels. The round machined aluminum fitting is permanently attached to each module and slid right into place connecting the modules together. It’s a real nice design. I plan on sealing the frame with black silicon caulking around the outer panels to keep wind from circulating behind the panels.
When installing the last panel (#6) it took a little more time than expected. The trick is to keep panel (#5) loose so you can place panel (#6) over the 4 inch hole going into the house. Then tighten the mounting screws.
Plugged in the fan and waited for the weather to clear. At about noon the sun came out. I have an old Radio Shack indoor/outdoor thermometer. I placed the probe in behind the fan into the 1st panel. The temperature rise was almost instant. Found out the old thermometer only went to 159 degrees F and started flashing HHH after that. So I don’t know the max temp inside the panel, only that it was over 159 degrees F all day. Outside air temp at the time was around 15 degrees F with a wind of 8 mph. Air temperature coming into the room is a constant 82 degrees F. It works!
E.Miller Fairplay, CO